Academic Support Brightspace
Brightspace is Langara's central course hub and learning management system. Brightspace is used to access content (such as notes, lecture slides, and readings), submit assignments, participate in discussions, take quizzes, view your grades, and more.
Learn more about Brightspace tasks and tools:
Navigate Brightspace
Accessing Brightspace
Log in to Brightspace via the Quick Links page on Langara.ca, by going to d2l.langara.ca, or selecting the Log in to Brightspace button at the top of this page. Log in with your Langara email address and password (e.g., jsmith00 [at] mylangara.ca (jsmith00[at]mylangara[dot]ca))
If you are having trouble accessing Brightspace or finding your courses, refer to Common Issues and FAQs.
If you do not know your Langara email and password, refer to activate your ID and email or reset your password.
On the Brightspace Homepage, find your current courses in the My Courses widget or in the Course Selector menu (waffle icon).
The following recording provides a brief overview of Brightspace navigation.
Review Navigate Brightspace and find your course for more information.
Navigating Brightspace
Brightspace may be used for discussions, quizzes, submitting assignments, distributing content and information, and other learning activities.
All Brightspace courses will have common elements such as a home page and menu.
Each course home page will have the following menu items:
- Course Materials which has access to Content (the main material of your course).
- Communication which includes Discussions, Email, and Announcements.
- Assessments menu has Assignments, Quizzes, Surveys, and more.
- My Tools such as Calendar, Class Progress, Grades, Groups, and more.
These tools will be discussed in detail on this page.
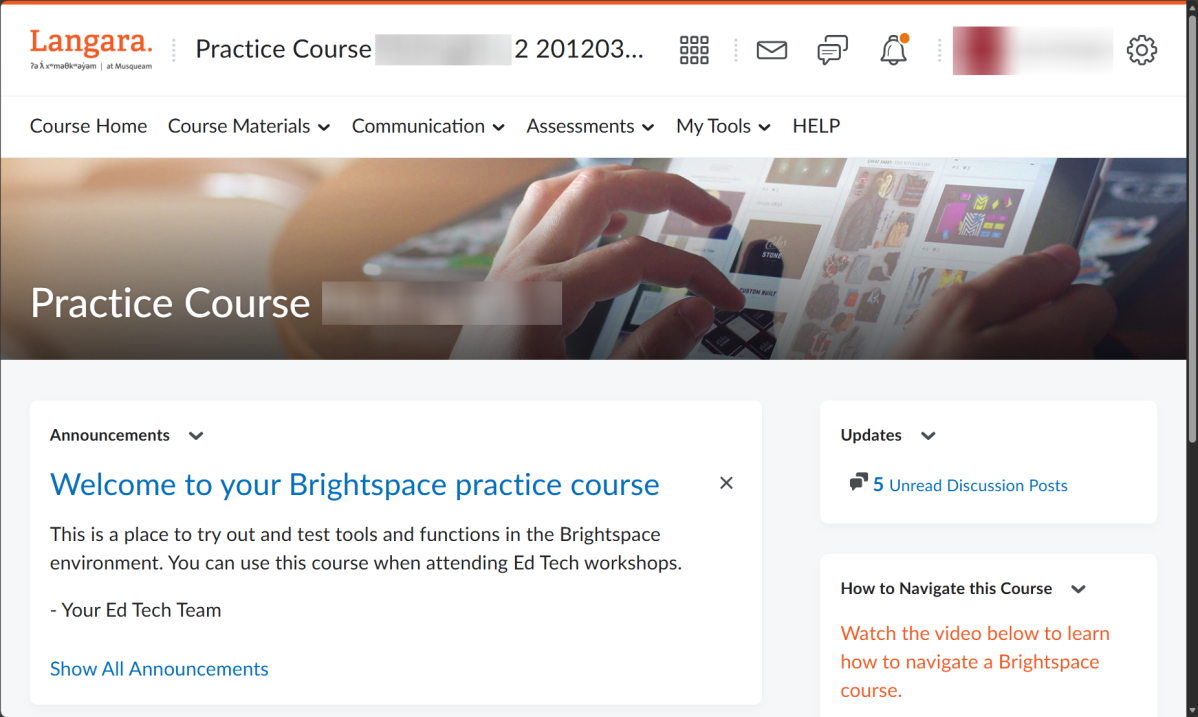
Depending on the layout chosen by your instructor, your Course Home page might contain:
- An Announcements widget, showing items to your instructor wants to bring to your attention.
- An Updates widget, displaying links to items like unattempted Quizzes, new Discussion postings and unread emails.
How Brightspace is used and organized will depend on your instructor. However, Brightspace is generally organized by Modules, like folders, and topics which may be pages, files, links, activities, or media. To navigate content use:
The Table of Contents by opening the Course Materials menu and selecting Content.
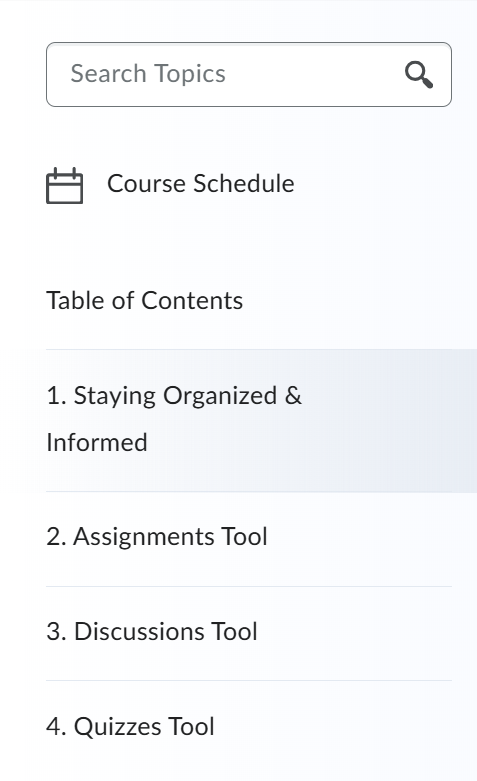
The Side Panel available in content topics.

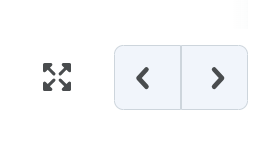
The Previous and Next buttons in the top-right and bottom-right of each page allows users to move between topics.
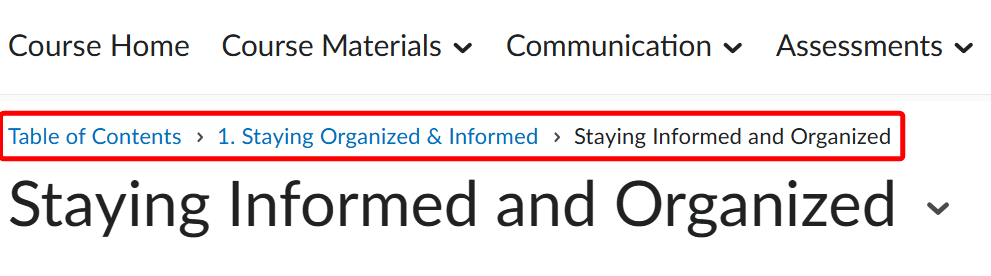
The Breadcrumb navigation at the top of each topic allows users to move back the module level or to the table of contents.
The following recording provides a brief overview of navigating Brightspace courses.
Learn more about the Brightspace Course homepage.
Brightspace Accessibility
Brightspace can be customized to make it easier for you to access. Brightspace allows users to customize account settings such as font size and automatically marking content as read.
Langara's Brightspace includes a text to speech tool that reads content aloud while synchronously highlighting what is being read. Use the Listen button to activate this tool.

The Listen button has many options for speed, voice, and visual customization. Learn more about using the Brightspace Listen button.
Brightspace also has a tool for reading uploaded documents. Under the document frame, use the Open with docReader button. For more information, read the docReader guide.
In addition to built-in Brightspace tools, you may find it useful to customize your browser font size, page zoom, default fonts and other settings.
If you have any questions about using assistive technology at Langara, please self-register for Brightspace course for AT users. This Brightspace course is a free, self-directed resource collection to help you get started with assistive technology and Brightspace. For specific help with assistive technology at Langara, email assistivetech [at] langara.ca (assistivetech[at]langara[dot]ca). For general information, consult Assistive Technology User Guides.
Next Steps
To see Brightspace content in context, self-register for Beginner's Guide to Brightspace. This Brightspace course is a free, self-directed resource collection to help you get started with Brightspace.
Assignments
To access assignments, open the Assessments menu and select Assignments.
Submitting Assignments
The Assignments tool enables you to upload and submit assignments directly into Brightspace.
- In the Assignments tool, choose your assignment and note the instructions.
- Depending on the assignment, you may need to:
- When you are ready, click Submit. On the next page, a File submission successful message will display.
Some assignments might have file format restrictions noted under Allowed File Extensions. Ensure you are submitting the correct file type. Review possible file upload errors for more information. When uploading a file, ensure the file finishes uploading before selecting Add. Ensure you verify you have uploaded the correct file.
Review Brightspace resources on submitting and managing assignments for more information.
Viewing Assignment Grades and Feedback
Assignment grades and feedback may be visible in the Grades tool in the My Tools menu.
Alternatively, you can always see assignment grades and feedback in the Assignments tool. Locate your assignment and view your grade in the Score column and select the Unread link in the Evaluation Status column for feedback details if available.

For more information, read about assignment feedback.
Troubleshooting Assignment Issues
For support with issues submitting assignments such including required fields, supported file types, and uploading issues, consult troubleshooting Brightspace assignments.
If you are having trouble submitting an assignment in Brightspace and the submission deadline is approaching, EdTech recommends emailing your instructor to inform them of the technical difficulties you are facing.
Turnitin

Turnitin is a text matching tool that some instructors may use to compare submitted Brightspace assignments to existing work. Turnitin may also be used to provide feedback on your submission. If your instructor has enabled Turnitin on an Assignment, you will see a small binoculars and document icon next to your assignment and the message "This assignment will be submitted to Turnitin™" on the Assignment submission page.
The process to submit an assignment does not change if your instructor uses Turnitin.
Accessing Turnitin report and feedback
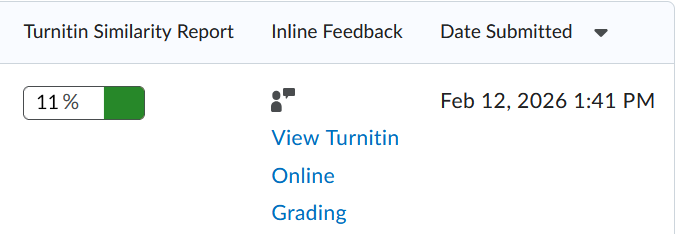
If your instructor has enabled the Similarity Report, to view your score:
- Open the Assignments tool.
- Select the submission link in the Completion Status column.
- On the next page, in the Turnitin Similarity Report column, select the percentage bar to view your Turnitin score.
- If your instructor has used Turnitin to provide feedback, select the View Turnitin Online Grading link in the Inline Feedback column.
For more information, review understanding the similarity score for students.
Review information about understanding Turnitin feedback.
For more information, review the information provided by Turnitin's Student Hub.
Next Steps
To practice a Brightspace Assignment, self-register for Beginner's Guide to Brightspace. This Brightspace course is a free, self-directed resource collection to help you get started with Brightspace.
Discussions
To view and post to discussions, open the Communication menu and select Discussions.
Participating in Brightspace Discussions
To participate in Discussions:
- Open the Communication menu and select Discussions.
- Select the Forum that contains the topic you want to post in.
- Click the Topic name.
- To post a new thread, click Start a New Thread.
- To reply to a thread, click Reply to Thread.
- Enter a subject and message.
- If you are asked/need to record audio or video as part of a discussion, use My Media to add audio or video in Brightspace discussions.
- Attach any files if needed.
- Click Post.
If you would like to be notified of replies to your thread, check the Subscribe to this thread checkbox.
Review the following video for more details:
Learn more about Brightspace Discussions.
Things to keep in mind
Instructors may set start and end dates for Discussions. Outside the availability dates, you may not be able to see the Discussion or add threads and replies.
Instructors may require you to post a new Thread before being able to view existing Threads and reply. Under the Topic title, you will see the message "Must post first."
For more information read Communicate with others using Discussions.
Next Steps
To practice posting and replying to a Discussion, self-register for Beginner's Guide to Brightspace. This Brightspace course is a free, self-directed resource collection to help you get started with Brightspace.
Quizzes
To access quizzes, open the Assessments menu and select Quizzes.
Writing Quizzes
In the Quiz List, select the appropriate quiz.
- The Quiz Details page shows availability, time allowed, number of available attempts, and additional instructions.
- Select Start Quiz when you are ready to begin.
- Note if quizzes have multiple pages. Be aware that answers automatically save.
- If required, you can use My Media to add audio or video in Brightspace quizzes.
- When you are finished, click Submit Quiz.
Consider the following video demonstration of accessing and completing a quiz:
Viewing Quiz Results
Depending on the settings, you might be able to see your Quiz results immediately after submission.
Otherwise, you can view your results after the Quiz has been graded and marks published by your instructor. Depending on settings, you may see your grade in the Grades tool or in the Quiz list. Use the Quiz List to view attempts and feedback by selecting the link in the Evaluation Status column beside the relevant quiz.
Things to keep in mind
Keep in mind that once you’ve entered a quiz with a time limit, the timer does not stop counting down, even if you log out and log back in; so make sure you have a reliable Internet connection. If you get disconnected during a quiz, you can log back in to Brightspace and continue, as long as the time hasn’t run out. If you have trouble logging back in while a quiz is in progress, contact your instructor.
If you would like, you can hide the timer during a quiz by selecting the Hide Timer button on the top-right corner.
Warnings are displayed at certain times to support awareness of time left. The following warnings are applied:
- 1 minute remaining on the quiz
- 5 minutes remaining (only on quizzes with 10 minutes or longer quiz time limit)
- Half of the elapsed time (only on quizzes with 20 minutes or longer quiz time limit)
There is also an option to review quiz instructions and details without leaving the quiz. Just click the Quiz Information link at the bottom of the lefthand pane.
Next Steps
To practice a Brightspace Quiz, self-register for Beginner's Guide to Brightspace. This Brightspace course is a free, self-directed resource collection to help you get started with Brightspace.
Grades
You can see grades published to the gradebook by opening the My Tools menu and selecting Grades.
Viewing your grades
In Grades, you can see the points you achieved and the weight of each published item. If your instructor has provided feedback it will be available in the Comments and Assessments column.
Consider the following video for a tour of Brightspace Grades.
For more information about individual grade items, review understanding your grade.
For information about the structure of the course gradebook, read understanding the gradebook.
Note: Which grade items show up for you, when they appear, and what data is published in the gradebook will depend on how your instructor has set up your individual course.
Next Steps
To view an example gradebook, self-register for Beginner's Guide to Brightspace. This Brightspace course is a free, self-directed resource collection to help you get started with Brightspace.
Other Tools
Classlist and Email
In the My Tools menu, select Classlist to see a list of your peers and, depending on course settings, instructors and assistants.
You can use the Classlist to send emails to your peers' Langara email. Replies are automatically sent to your Langara email.
Learn more about the Classlist tool and using the Classlist to send emails.
Groups
You may be automatically enrolled in a group or asked to join a group.
If your instructor asks you to enroll in a group:
- Open the My Tools menu.
- Select Groups.
- Select the View Available Groups button.
- In the Actions column of the group you would like to join, select Join Group.
Depending on how Groups are used by your instructor, you may be able to view other group members by selecting the link in the Members column.
Notifications
Brightspace can send email notifications for discussion subscriptions, newly posted grades, Assignment feedback, Quiz marks, and more.
To set up notifications, select your name in the top right corner of Brightspace and choose Notifications.
On this page you can change the email where Notifications are sent, what types of activity you want to be notified about, and exclude any courses that you don't want to be notifications from (not recommended).
For more information, review how to change Notification settings and consider the following video demonstration:
Personal Settings
Brightspace allows users to customize their profile and account settings.
To customize your profile, select your name in the top-right corner of any Brightspace page and choose Profile.
You can add a profile picture, nickname, links to your social media, and more. Learn more about Brightspace Profile settings.
To change account settings such as pronouns, Brightspace appearance, and other settings, select your name in the top-right corner of any Brightspace page and choose Account Settings. Learn more about Brightspace Account settings.
Self-Registration
Some Brightspace courses are available for you to self register in. You may be instructed or invited to a course. To do self register in a Brightspace course:
- From the Brightspace homepage, click Self Registration.
- Select the course in which you want to register.
- Click the Register button.
- Click Submit.
- Click Finish.
Depending on the course, you may receive an email confirming your registration, or it may appear immediately in your My Courses widget. If the course has co-requisites or restrictions, you may receive an email rejecting your application, or your registration may need to be confirmed by the instructor or course manager before you will be able to see the course. If you still can’t see your course and believe you should be able to, contact the course manager or instructor for help.
Awards
You may earn digital badges in certain courses. To view your awards:
- From the Brightspace homepage open the My Tools menu.
- Choose Awards.
- You can add your award to your Brightspace profile by selecting Share and clicking the Share to Profile button.
Consider the following recording for a demonstration:
Reading Lists
A growing number of Langara instructors are moving away from traditional textbooks, and instead using an array of resources (book chapters, journal articles, websites, and more) to support course curricula. Langara uses a tool called Reading Lists and encourages instructors to use Reading Lists to organize material. Reading Lists can be embedded into Brightspace or accessed via link.
For more information, review the Langara Library's Reading List Guide. Reading Lists has many features to help you track progress and stay organized.
Next Steps
To view other tools and features in Brightspace, self-register for Beginner's Guide to Brightspace. This Brightspace course is a free, self-directed resource collection to help you get started with Brightspace.
FAQ
How to Start Your Courses and Resolve Common Problems.
Course does not appear
If a course you are registered in does not appear in Brightspace, it may be:
- The course has not started yet. For Regular Studies courses, this will be the first day of the term. For Continuing Studies courses, this will be the first day of the class.
- The course has not been made active by your instructor. If your course has started but you cannot see it in Brightspace, please contact your instructor. Advise your instructor to contact EdTech if they have questions about making a Brightspace course active.
- That you have recently registered. It may take up to 24 hours after registering for a course for the course to become available to you in Brightspace. If, after 24 hours your course does not appear in Brightspace, verify your registration in the Student Information System and then contact your instructor.
Login issues
Log in to Brightspace via the Quick Links page on Langara.ca, by going to d2l.langara.ca, or selecting the Log in to Brightspace button at the top of this page.
Log in using your Langara email and password. Ensure you activate your Langara email. If you have forgotten it, you can reset your password. Contact IT for additional assistance.
Browser support
Brightspace supports up-to-date Chrome, Safari, Edge, and Firefox browsers. Review Brightspace browser support for more information.
Audio or video not playing
Browser security settings may prevent media from displaying correctly in Brightspace.
In Chrome, you may need to change site settings permissions.
In Firefox, turn off Enhanced Tracking Protection.
In Safari, you may need to deactivate Prevent cross-site tracking and allow cookies.
Return to Student Learning Technology home to explore other tools.
Have questions?
Email online-student-support [at] langara.ca (online-student-support[at]langara[dot]ca)
